

How to Configure a Seating Chart
The Attendance Tool has a configurable Seating Chart function which allows an instructor to create a seating chart which can be used for the entire semester. This seating chart can be updated as needed to reflect updates in seating arrangements throughout the semester if needed.
Create a Seating Chart
-
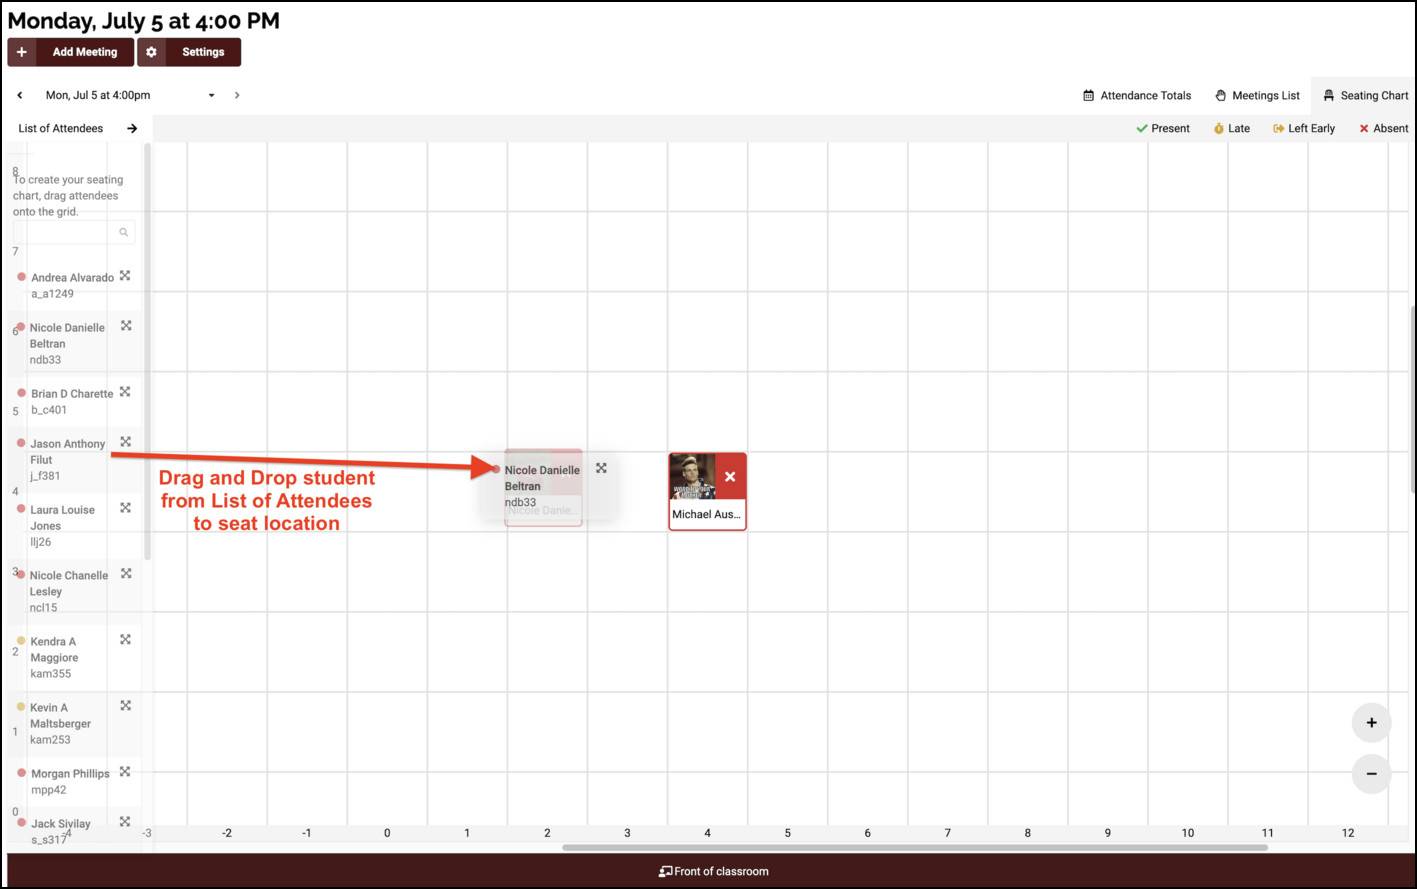
Select the Seating Chart for an Attendance meeting which has been created.
- From the List of Attendees, drag a student into the grid and drop them into a grid slot.
NOTE: The Attendance tool will automatically save the instructor's work.
-
Repeat step 2 until all students in the List of Attendees have a seat.
-
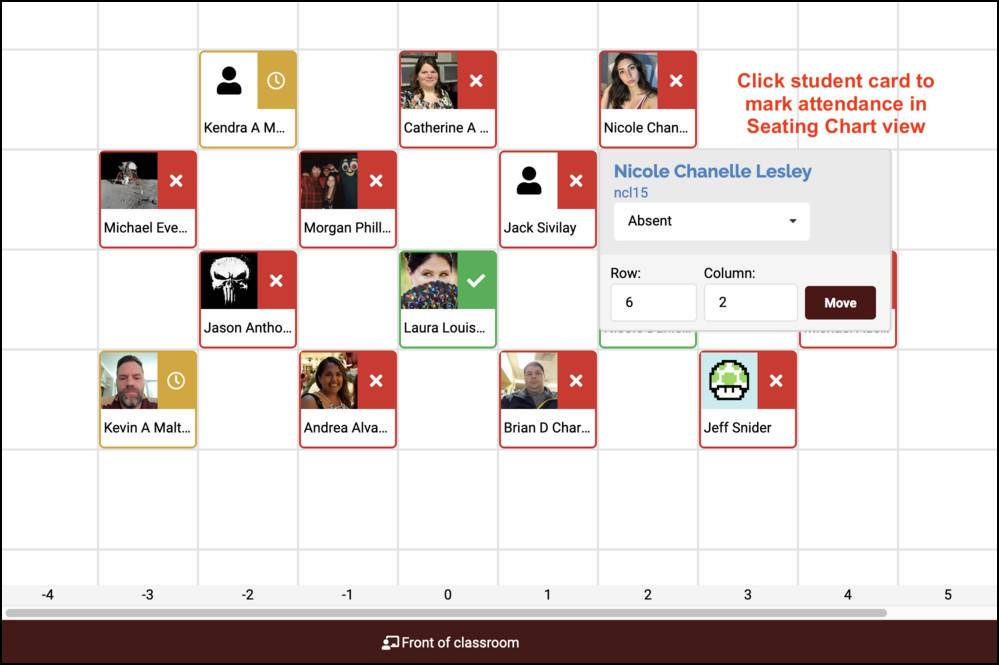
Click the student card to mark their attendance.