How to Map a Network Drive
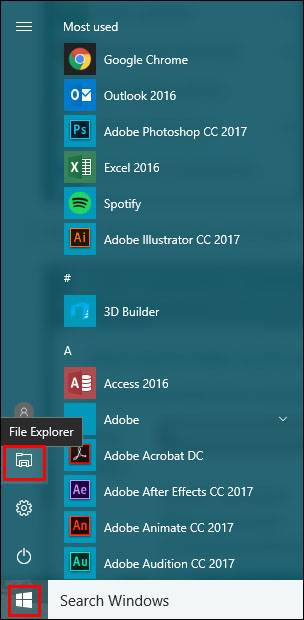
- Open the Windows Start Menu and click File Explorer.
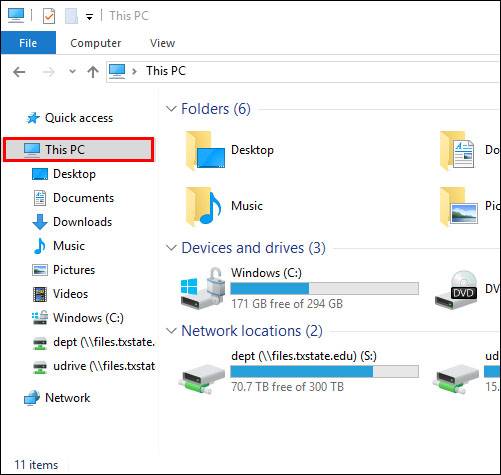
- When File Explorer opens, click This PC.
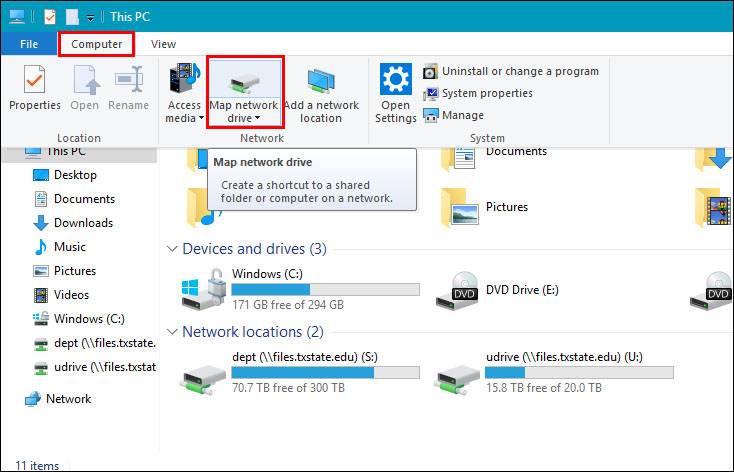
- Select Computer at the top, and then Map Network Drive.
- When the Map Network Drive wizard opens, select the drive letter you want to use for the mapping. Click Browse and select the location you want to map.
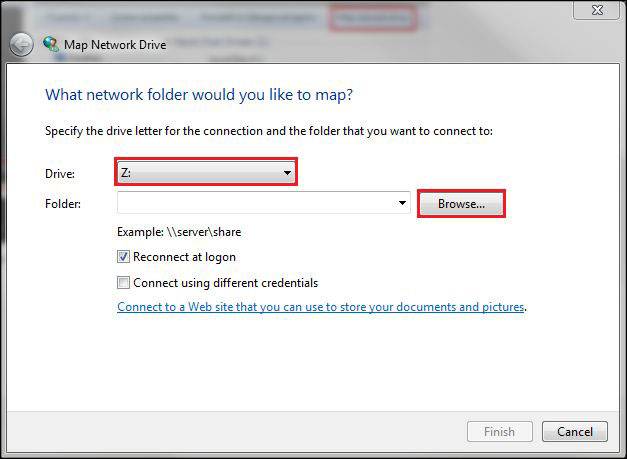
- In the Browse window, select the computer and the shared folder you want to map to. When you are done, click OK.
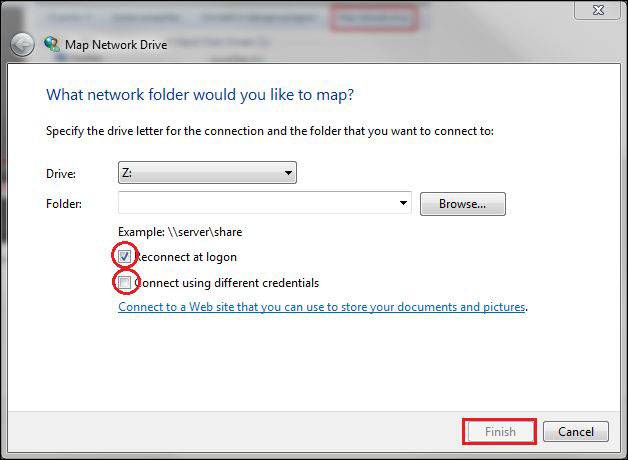
- If you want Windows 7 to reconnect to this drive at each login, make sure you check Reconnect at Login.
NOTE: If you map a drive to a computer using Windows Vista, you might also need to connect using a user account defined on that computer. In this case, check Connect Using Different Credentials.
- When you"re done, click Finish.
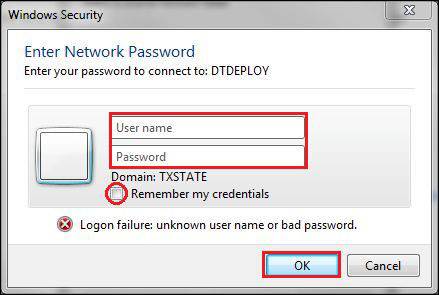
- In some scenarios, as mentioned above, you will be asked to enter a username and password to connect to the network location. In the Username field, type your Texas State Net ID. For Password, enter your associated Net ID password. When you have typed things incorrectly, click OK.
NOTE: You can select Remember my credentials and your username and password will be saved for future logins.
When the mapping process is complete, the newly created drive will open and become available in the Computer window and in Windows Explorer.
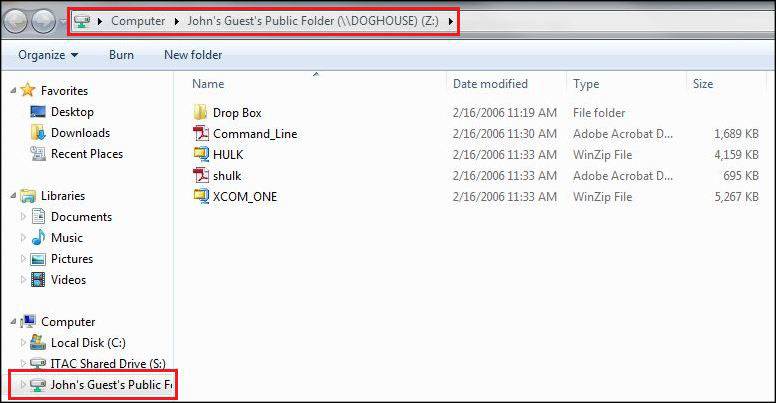
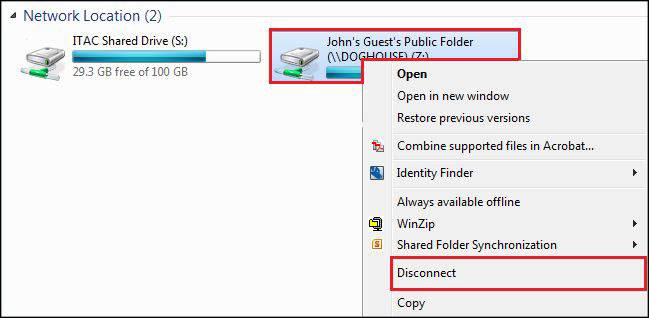
- In case you need to delete a previously created drive mapping, open the Computer window. All of the mapped drives will be available in the Network Location section, beneath your partitions and ROM drives.
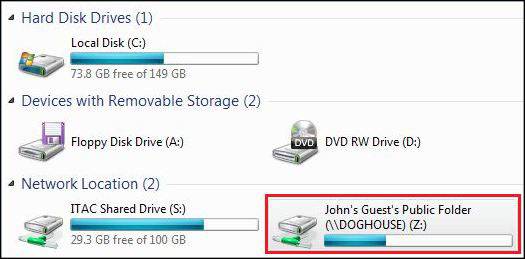
- To delete a drive mapping toward a network location, right-click on it and select Disconnect. The deleted mapped drives will stop showing up in your Computer window. In order to restore them, you will have to create the mapping again.
