How to Set up Remote Desktop Access on the Host Computer (Windows 10)
NOTE: The host system refers to the computer on the Texas State network that you are trying to access. If you need to connect from off campus, first log into TXST VPN.
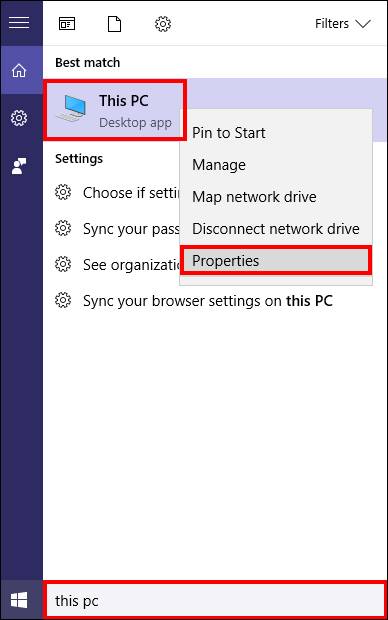
- On the host system, click the Search Windows icon, right-click This PC, then click Properties.
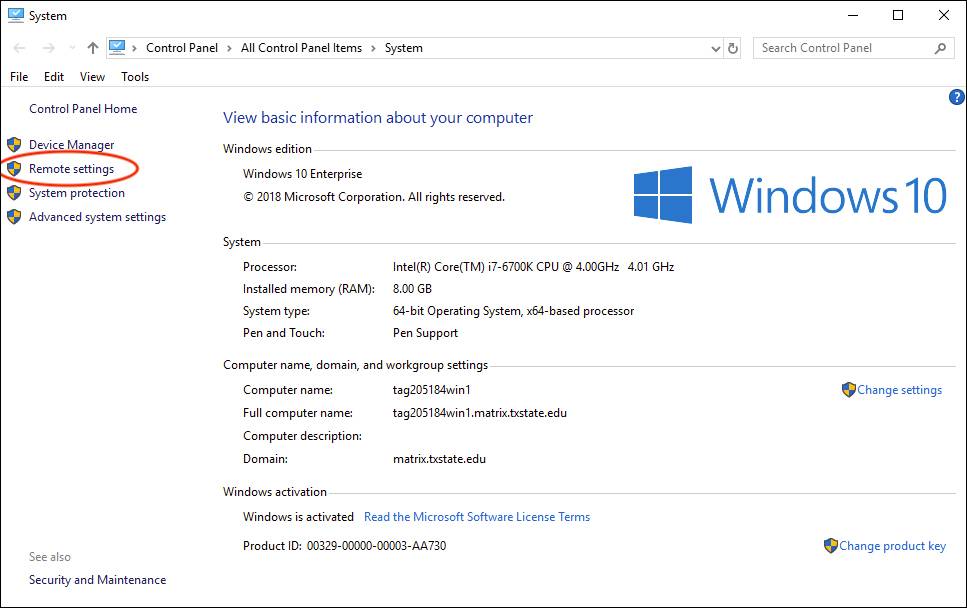
- Click Remote settings.
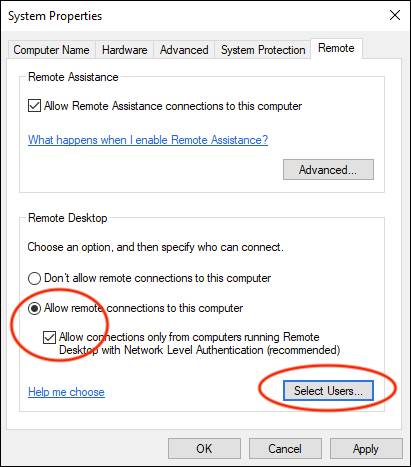
- Click the checkbox next to Allow connections only from computers running Remote Desktop with Network Level Authentication (more secure), then click Select Users.
NOTE: You will need Administrator access to change these options.
- On this screen, you want to make sure your NetID is shown in or under the white box.
- If your NetID is present, click OK and skip to Step 9 below.
NOTE: This may require a restart of your computer. - If your NetID does not exist in or under the white box, continue to the next step.
- If your NetID is present, click OK and skip to Step 9 below.
- If your NetID is not listed in or under the white box, click Add.
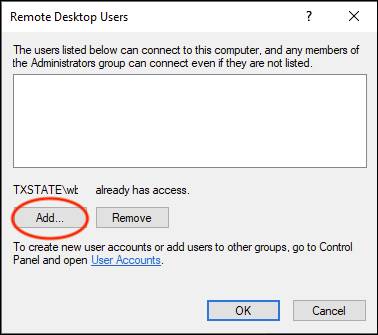
- Enter the NetID of the person you want to be able to access this computer remotely using this format: txstate\NETID
Example: txstate\zzz99
- Click Check Names.
NOTE: If prompted for a username and password, enter your NetID and Password to verify access.
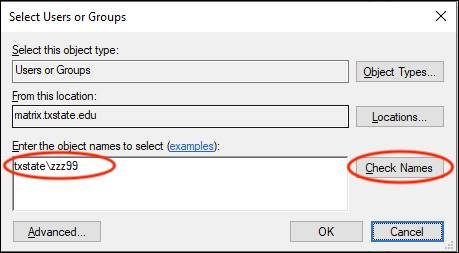
- You should now see the NetID listed similar to the one shown below.
- If this is correct, click OK.
- If not, please contact the IT Assistance Center for further help.
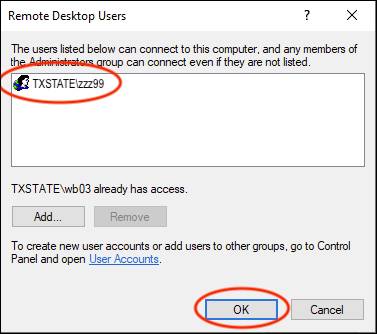
- You should now see the NetID in the white box as shown below. Click OK.
NOTE: This may require a restart of your computer.
- Open the Search Windows, then enter cmd and hit the Enter key.

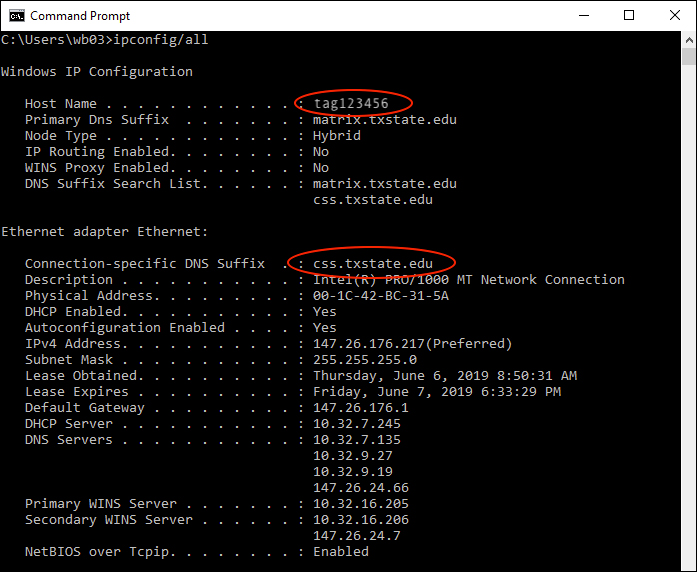
- In the command prompt window enter ipconfig/all and hit the Enter key.

- Search for the tag number (e.g., TAG123456) and the Connection-specific DNS Suffix (e.g., css.txstate.edu).
- Combine both pieces together to create your computer's access name (e.g., TAG123456.css.txstate.edu).
NOTE: Write the information you find down because you will need them to remotely access your computer.
