

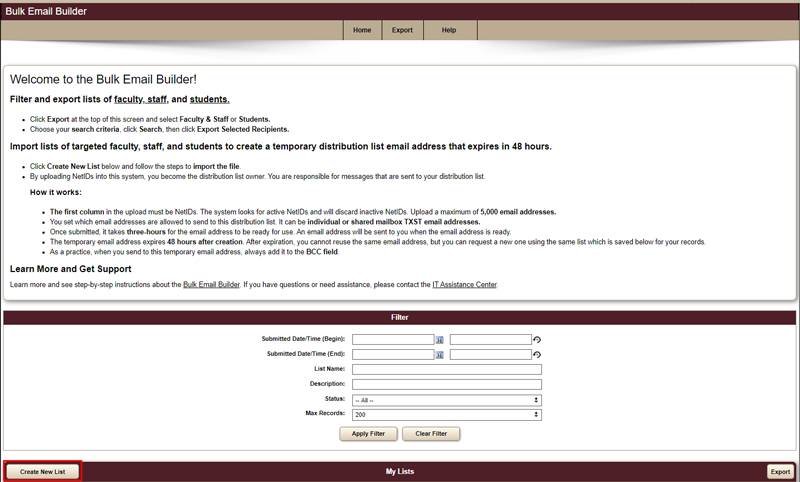
How to Upload a List and Create a Temporary Email Address
The Bulk Email Builder creates a temporary distribution list email address using an uploaded list of your choice. At minimum you upload a list of NetIDs and associated email addresses, and the system will generate a temporary email address. Sending to this email address will effectively send to everyone on the list. Here are a few things to know before you get started:
- Lists can contain a maximum of 5,000 active NetIDs.
- The first column in your spreadsheet must contain NetIDs.
- Before sending, Bulk Email Builder will validate all NetIDs and will discard inactive NetIDs.
- You are considered the distribution list owner when you upload a list making your responsible for content within messages that are sent to your distribution list.
- Once submitted, the distribution list creation process may take up to three hours.
- Once the list is created, you will receive an email notification with the name of the distribution list plus additional instructions.
- The list will be automatically delete 48 hours after it was created.
- The date and time of the deletion will be provided in the email notification. Once it has been deleted, you cannot reuse the email address. However, you can duplicate the list and generate a new temporary email address.
Follow these steps to upload a list and create a temporary email address (distribution list):
PRO TIP: Have your file containing your list of people ready to upload. Be sure NetIDs are in the first column. If you need to export a list from this system, do that first, then return here to create your temporary distribution list email address.
- Go to Bulk Email Builder.
- Enter your NetID and Password, and click Login.
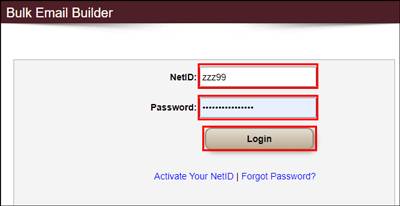
- If prompted, complete Duo authentication.
- Click Create New List.
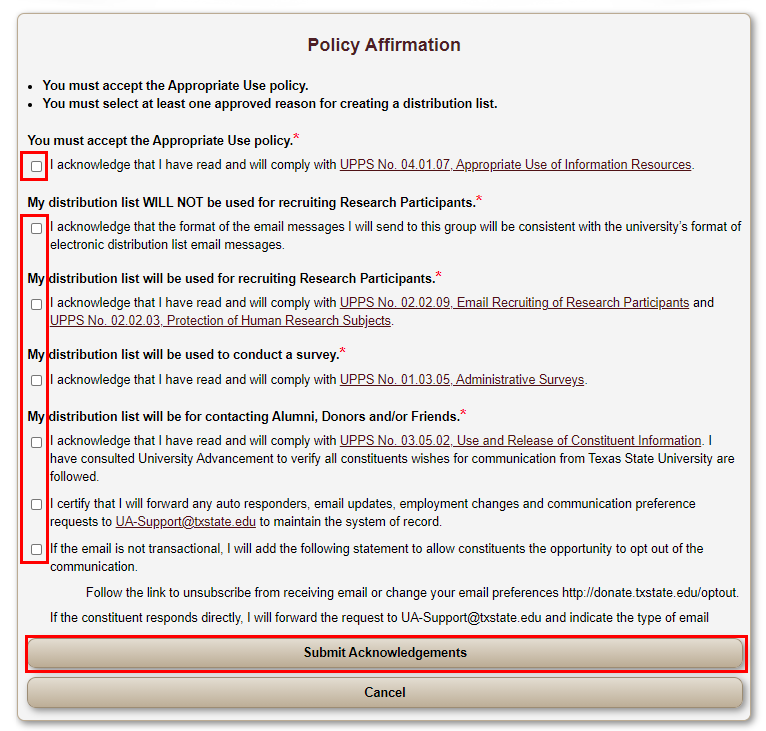
You will be prompted to accept the Appropriate Use policy and one of the approved reasons for creating this distribution list.
- Make appropriate selections, then click Submit Acknowledgements.
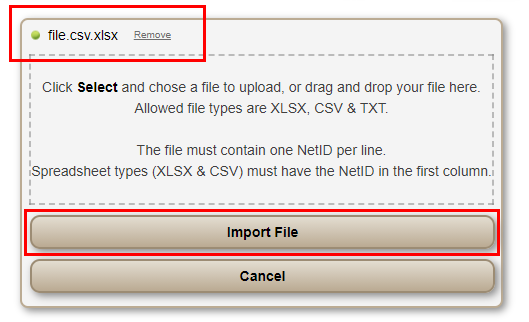
- To import your list, click Search, then browse to locate and click the file name. Alternately, drag and drop a file into the box on the screen.
- Allowed file types are XLSX, CSV, and TXT.
- The file must contain one NetID per line.
- Spreadsheets must contain the NetID in the first column.
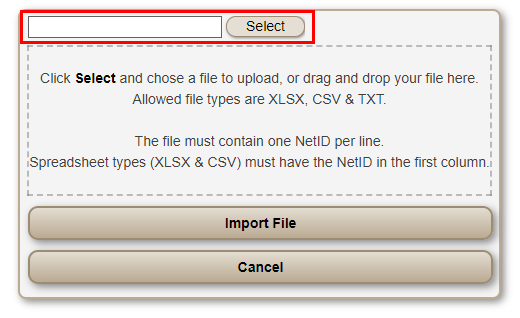
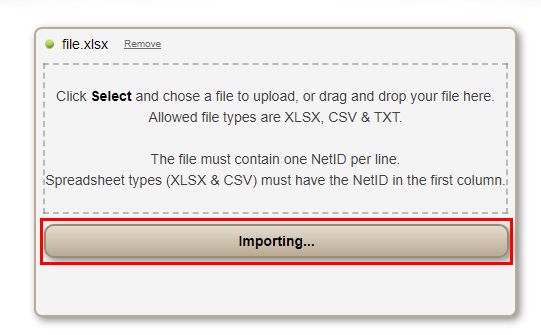
- When the file upload is complete, click Import File.
As the system imports the file, it is also validating NetIDs to be sure they are active.
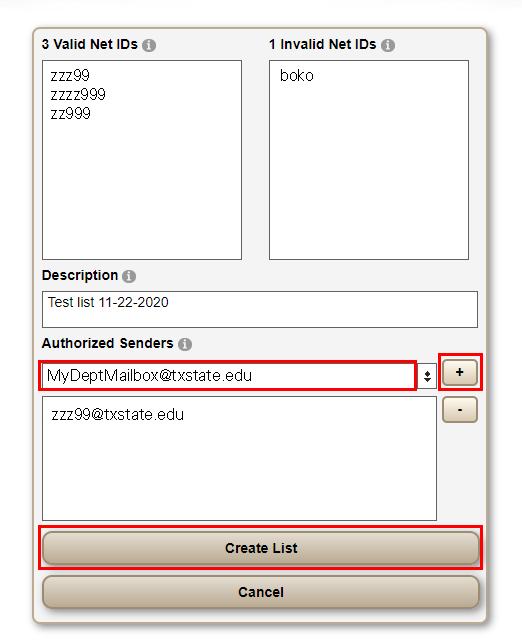
The system will list valid NetIDs in the first column and invalid NetIDs in the second column. This is displayed for your information only. You cannot correct any invalid NetIDs directly onto the screen.
NOTE: If you need to make corrections based on what appears in the Invalid column, click Cancel. Make adjustments to the file you uploaded, and repeat the above steps.
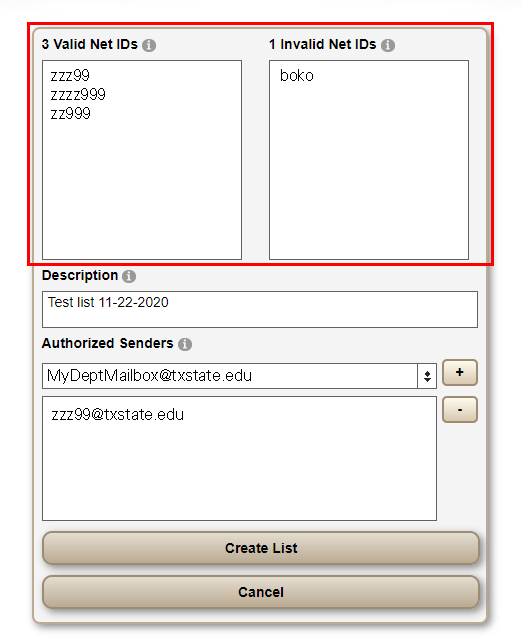
- Under Description, enter a unique and specific name for this list.
- Under Authorized Senders, enter an email address for who will be allowed to send to this distribution list email address, and click the Plus button.
PRO TIP: Authorized senders can be individuals or a shared mailbox. It must be an email address containing @txstate.edu.
Repeat this step to add additional authorized senders
- Click Create List.
You will see a message confirming that the request has been submitted.
On the Home screen, Under My Lists, you will see your list along with the status of the requested temporary distribution list email address.
IMPORTANT NOTE: It will take approximately three hours for the distribution list email address to be created and ready for you to use. When it's ready, an email will be sent to you containing the email address to use, which email addresses can send to this email address, and when the email address will expire.
